- Published on
Install Oh My Posh with Windows Terminal/PowerShell
- Authors
- Name
- Alexander Arana Escobedo

If you are working a lot with Azure and your Windows, macOS, or Linux terminal, you might like to have a nice overview of which Git branch, or maybe which subscription or cluster, you are currently using. This can be done with oh-my-posh.
You can achieve this in different ways, but I'm going to show you how I have done it with Windows Terminal/PowerShell.
Step 1: Install oh-my-posh
- Open a Windows Terminal and run the following command:
scoop install https://github.com/JanDeDobbeleer/oh-my-posh/releases/latest/download/oh-my-posh.json
Restart the terminal (If that does not help, simply run the command above again and open a new terminal tab.).
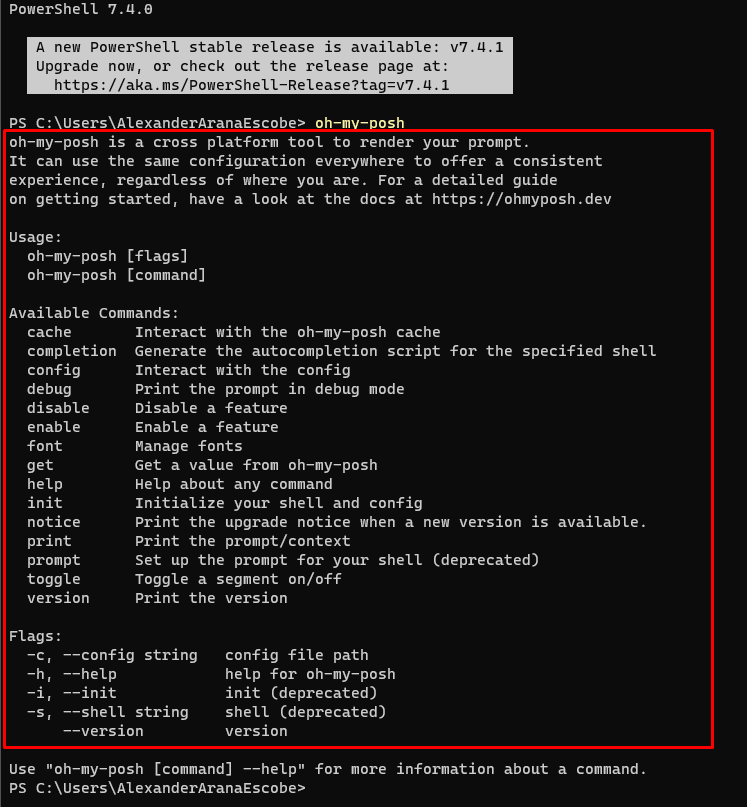
Type oh-my-posh and press ENTER. You should see the output as shown in the picture below:
- Run cmd:
oh-my-posh init pwsh --config "$env:POSH_THEMES_PATH\jandedobbeleer.omp.json"
- Copy the output and press ENTER:

Tada! You can start to see the oh-my-posh magic! But it doesn't look so good yet! 🎉 Let's fix it!

Step 2: Add oh-my-posh to your PowerShell profile
To ensure that your terminal always uses oh-my-posh, youneed to open your PowerShell profile.
Run
notepad $PROFILEon the terminal.If it does not work, it could mean that you don't have an existing PowerShell profile, so you will need to create one by running:
New-Item -Path $PROFILE -Type File -ForceRun
notepad $PROFILEagain:add
oh-my-posh init pwsh | Invoke-Expressioninside the notepad file and SAVE as the picture below:

Step 3: Install the CaskaydiaCove Nerd Font
This will install the necessary fonts so you get the nice icons on your terminal.
Click here to download the CaskaydiaCove Nerd Font
Unzip the CascadiaCode.zip folder
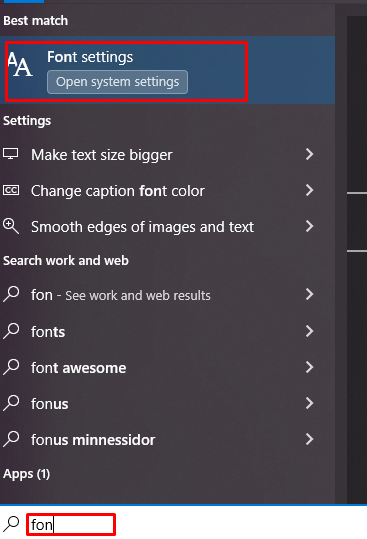
Navigate to the Font settings on your computer. You can do this by searching for it using the Windows start icon:
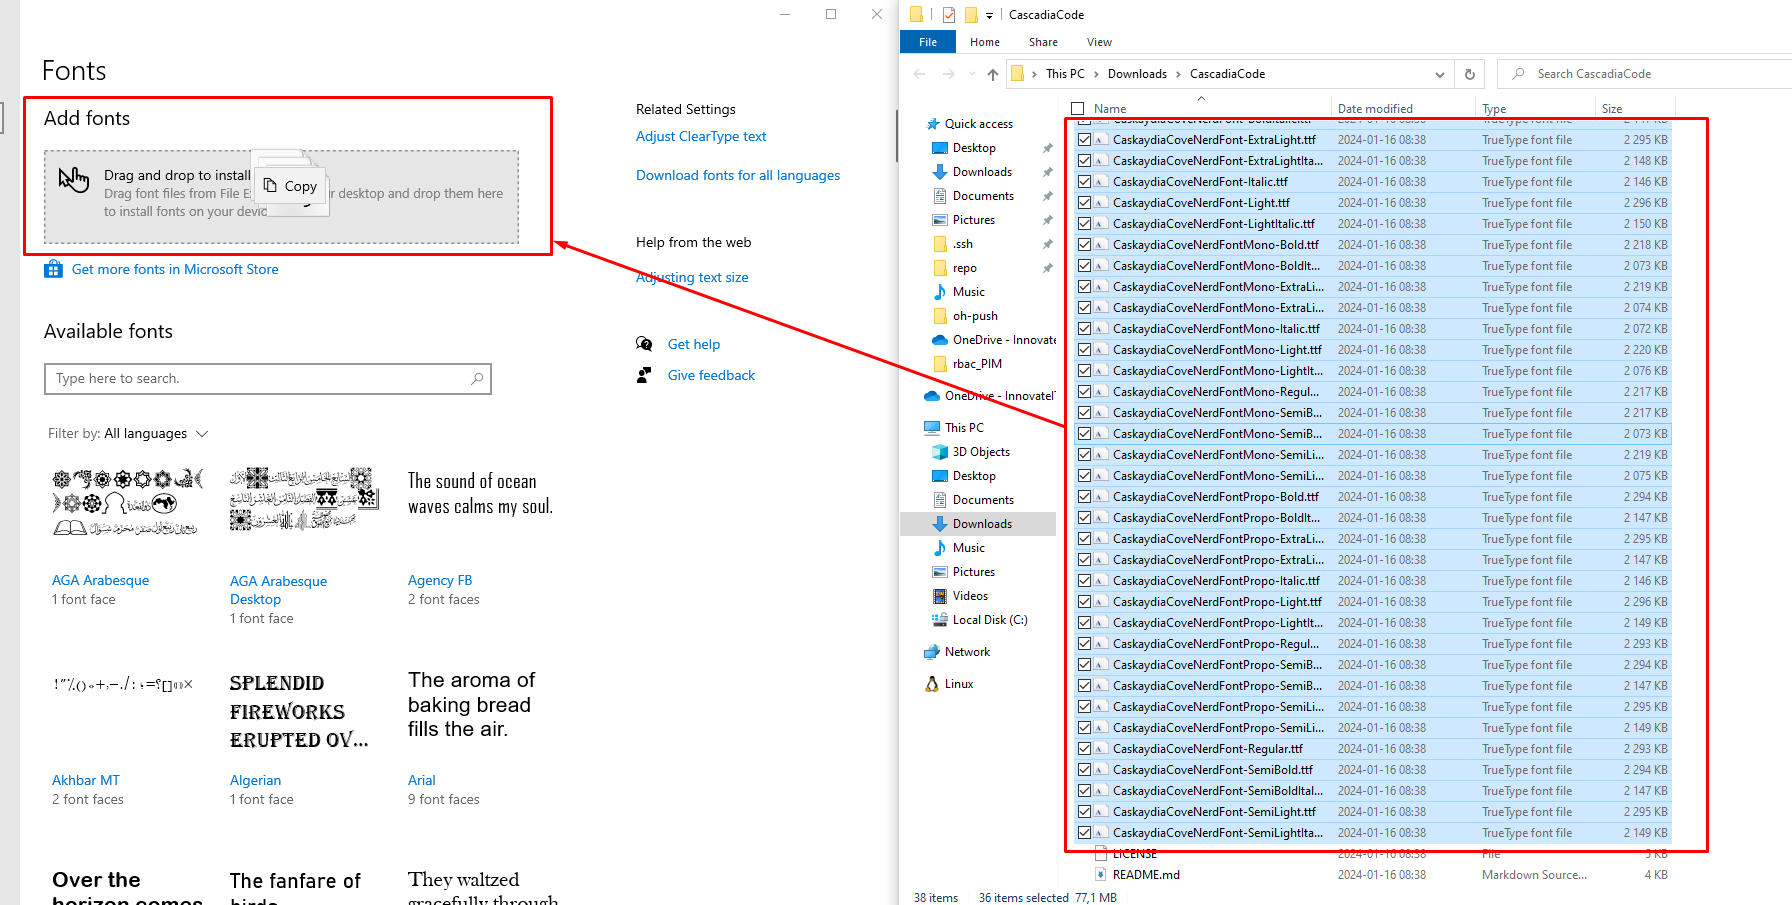
- Mark all the files (except the license and README file) inside the unzipped folder, and drag them to Add fonts.
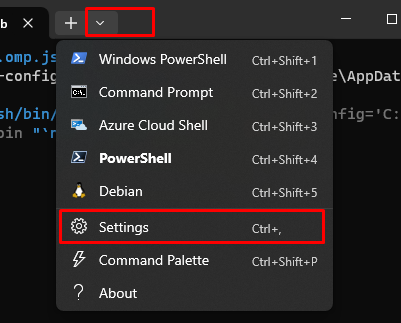
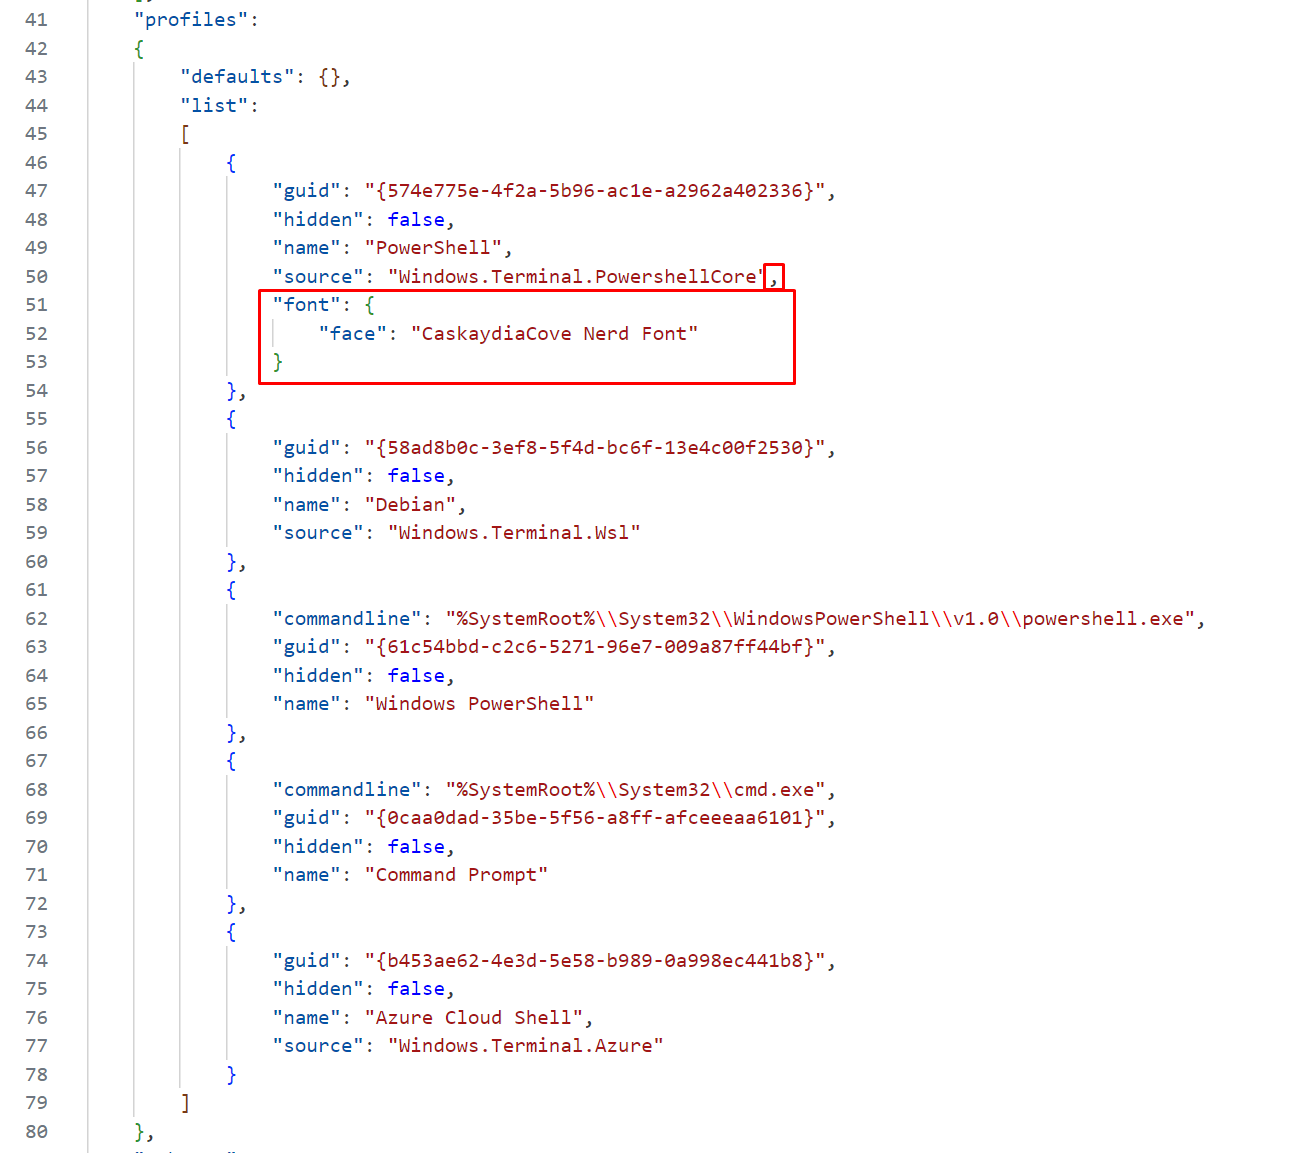
- Open your settings.json by selecting 'Settings' in the Windows Terminal dropdown menu while holding Shift.
- Add the following code snippet under your preferred list of terminals, in my case it's PowerShell Core (v7). You can also add it to PowerShell 5 or Debian, and more if you want:
 "font": {
          "face": "CaskaydiaCove Nerd Font"
      }
- Like this example (Don't forget the comma!):
- Tada again! Navigate to your terminal and see the nice icons 😊

Step 4: Themes
Oh-my-posh includes many themes out-of-the-box that you can use. It’s also possible to customize your own theme if you wish, but I will not cover that in this blog 🤓
Run
Get-PoshThemesto get all the themes from oh-my-posh.Run
notepad $PROFILEon the terminalAdd the command below to your user profile and replace the placeholder
[USERNAME]with your Windows username:
oh-my-posh init pwsh --config 'C:\Users\[USERNAME]\AppData\Local\Programs\oh-my-posh\themes\jandedobbeleer.omp.json' | Invoke-Expression
Like the example below:

My favorite theme for now is cloud-native-azure.omp.json.
For example, you can replace jandedobbeleer.omp.json with cloud-native-azure.omp.json in step 3 if you also want to try out the same theme.
If you want to find all the themes that were downloaded to your local computer, you can easily use the file path below:
C:\Users\[USER_NAME]\AppData\Local\Programs\oh-my-posh\themes
You can also find all the themes here: Themes | Oh My Posh and see how the design and icons look like 😉
💡 Extra Bonus Tip!
- Navigate to settings on the Windows Terminal.

- In the Default terminal application choose Windows Terminal and press SAVE.

What this will do is, when you open for example PowerShell, CMD, it will open them in the Windows Terminal instead! Quite nice if you ask me! 😎
I hope this guide helps you out! If you have any questions, don’t hesitate to reach out.
Alexander Arana.E